Papier Mâché Tray


Tray after


Papier Mâché Tray Restoration

Click image to open in enlargement window. Click image again to magnify. Use back button to return.

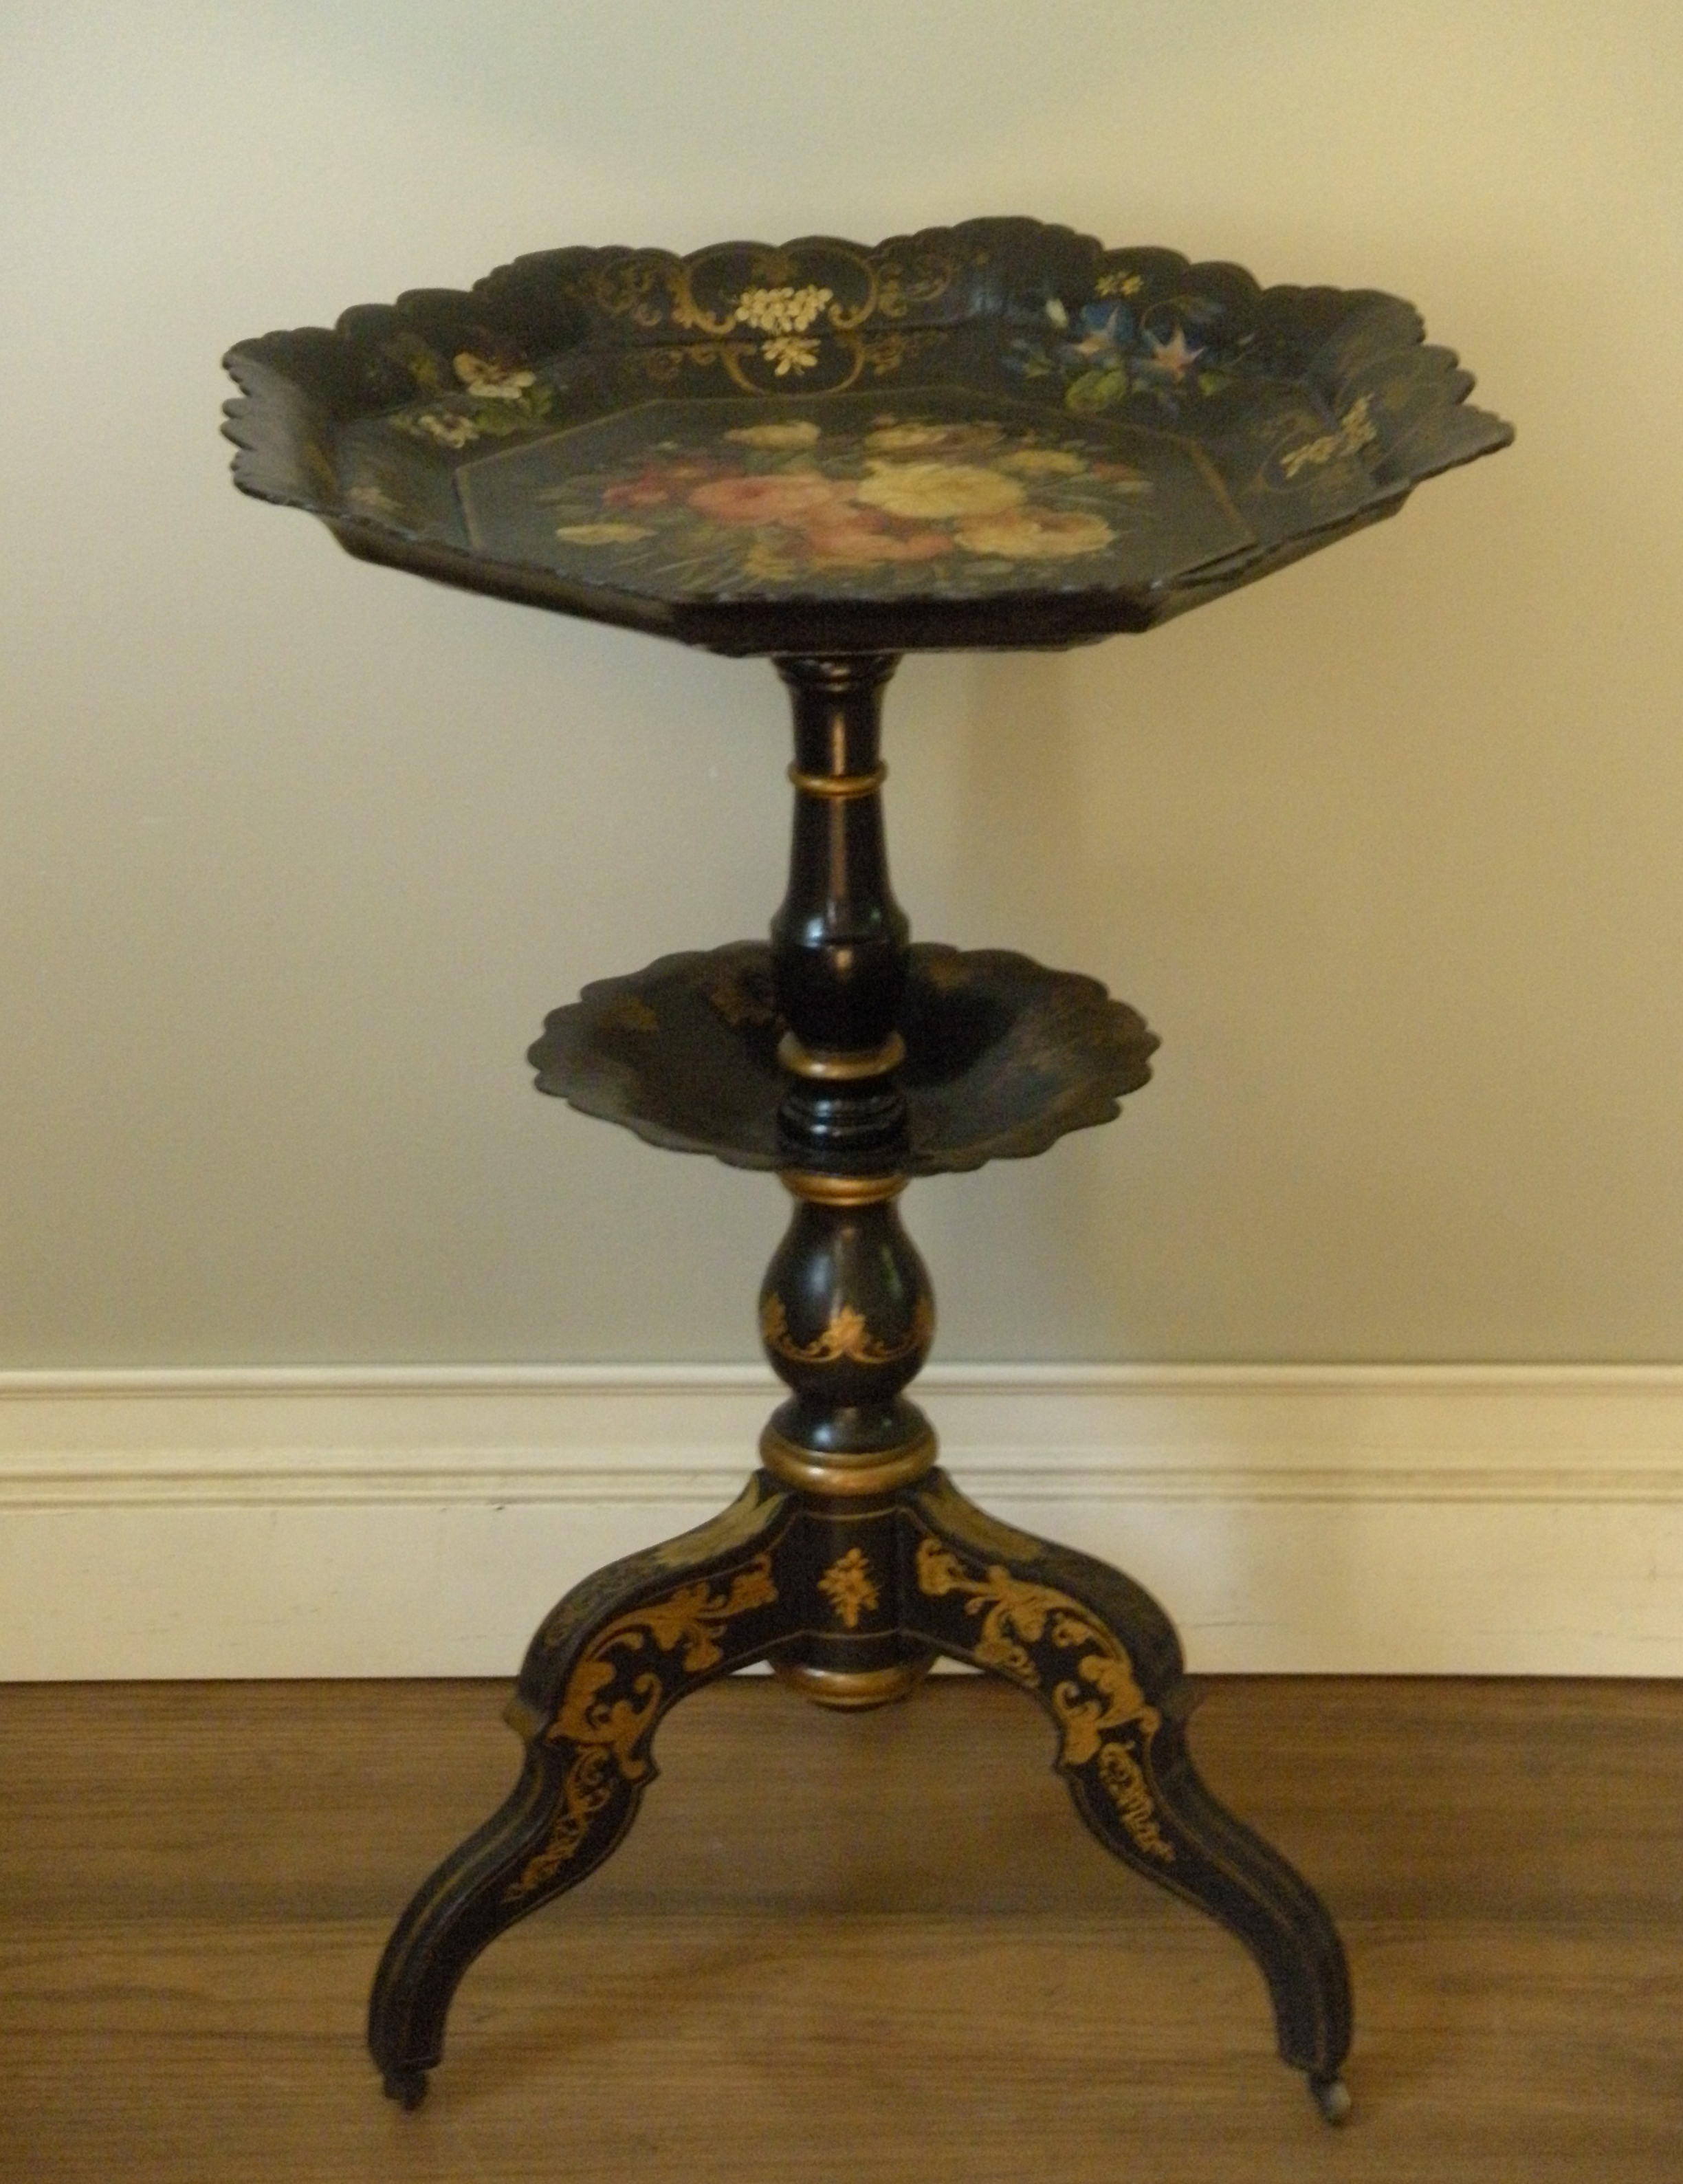
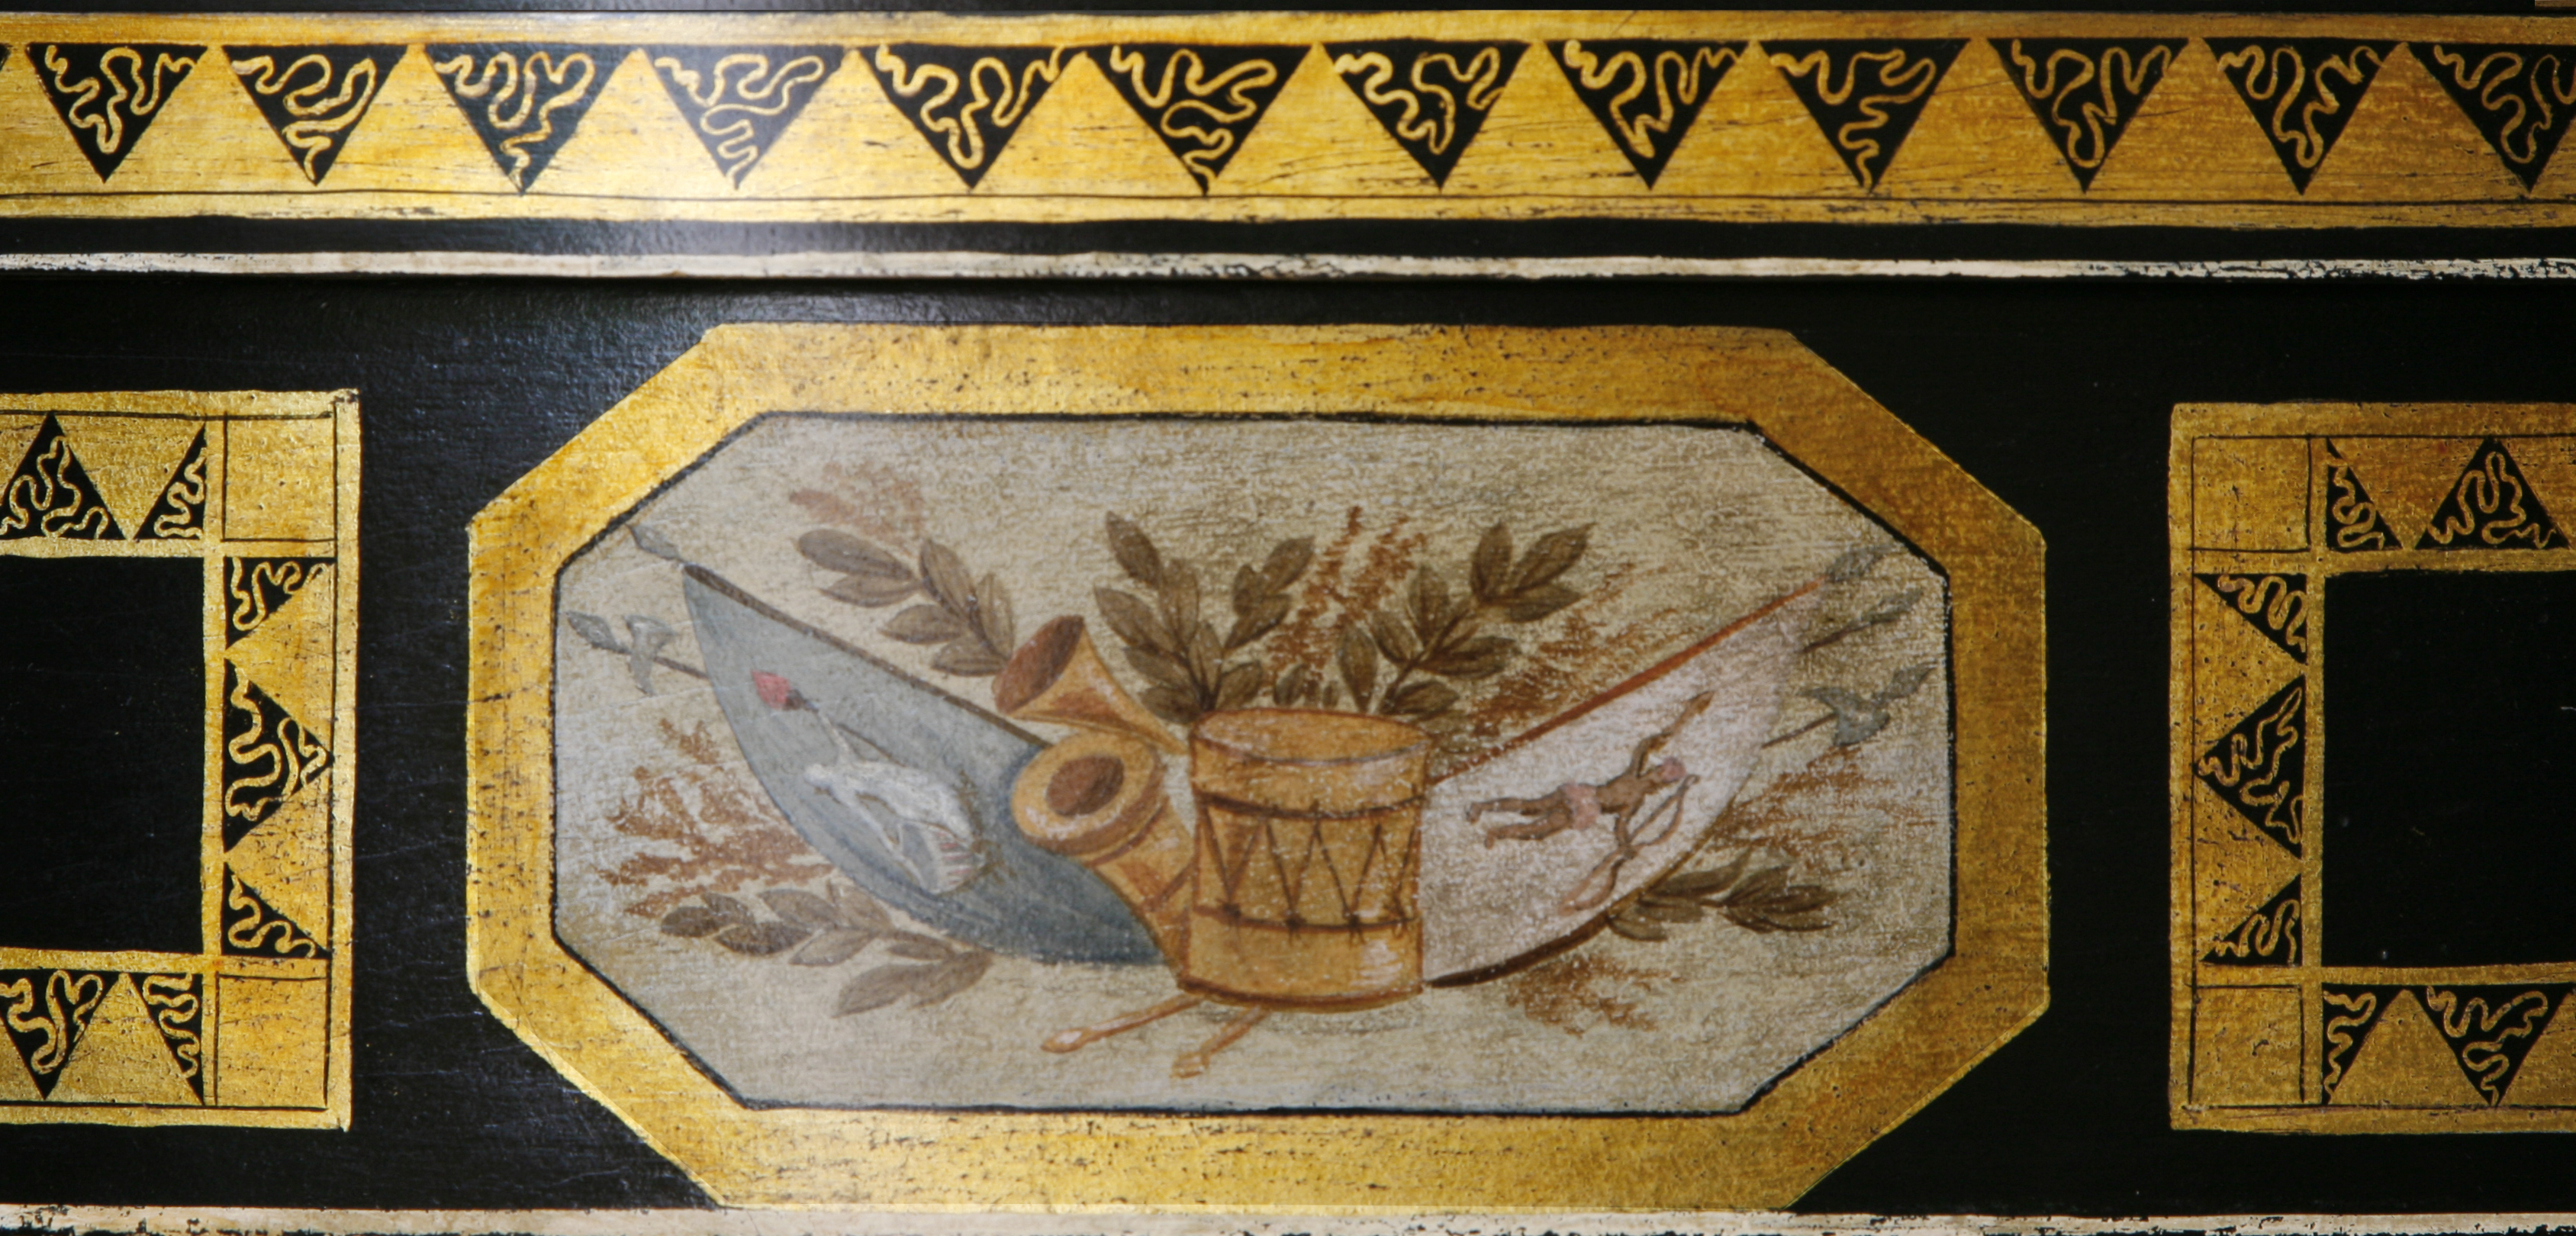
The photo above shows an English papier mâché tray after restoration. It had arrived in my studio with a damaged corner, and a few small pieces, all that remained of the original breakage.

Tray before 2

__________

After some consideration, and various trials, I concluded that the incomplete fragments were not enough to work with to rebuild the corner, and ultimately were of little use. I could think of no other solution than to reconstruct the corner with new material.

First I consolidated the slightly delaminated paper along the broken edge of the tray with an adhesive; at this time I also inserted some small wooden pins into the edge to anchor the epoxy putty that I would use to build the new corner. I then made a mold of the under side of the opposite corner of the tray, which I used as a support to create the shape of the new corner with putty.

Mold 1

Purple colored mold supporting the putty material.

mold 2

Removal of the mold after the putty had set.

__________

After smoothing and shaping the primary surface of the new corner, I finished the underside as well.

mold 4

__________

Finally, I painted the new area black, added the gilded decoration, and distressed the restored area to blend it in with the surrounding original surface.

Tray after 1

Restored corner above, another angle below with less glare.

Tray after 2

__________________________________________________________________________________________

Pair of Painted Mirrors


Mirror after

Restoration of a Pair of English Rococo Mirrors

Click image to open in enlargement window. Click image again to magnify. Use back button to return.

The mirror shown above is one of a pair. The carving of both is almost identical, the only noticeable difference being that one of the birds faces left, the other right.

When they first arrived in my studio, they looked much different, as can be seen in the photo below.

Mirror before

Their present condition was very poor, and it was difficult to determine what their original finish might have been. At some point, there had been an attempt to give them a gilded appearance by applying a gold-colored paint. Usually these coatings are composed of metallic pigments (sometimes called bronze powders) in an oil medium, which over time typically tarnish to a dark, greenish-brown color, as was the case here. Also clearly visible was a red paint color, most likely a part of the intended gilding effect.

The first task was to attend to the structural repairs. The photos below illustrate just a few of the problem areas.

mirror before 1mirror before 2

mirror before 4mirror before 3

Some new parts were roughly carved and attached to replace the missing pieces; these were later finessed to blend in with the adjacent areas. A few of these are shown below.

repair 1repair 2

repair 3repair 4

repair 5repair 6

With the frames structurally sound, we began the process of removing the paint layers down to the wood.

paint removal 1paint removal 2

__________

After cleaning,  there were some traces of gesso visible but no other signs of previous water gilding, or any other finish that might be construed as original.

After paint removal cr

Detail after cleaning

__________

It was decided to follow the client’s first inclination, which was to paint the mirrors white. Below are some detail photos of the final paint finish.

 Finish detail 1Finish detail 2

Finish detail 3finish detail 4

finish detail 5Finish detail 6

__________________________________________________________________________________________

Red Lacquer Clock Case

Red lacquer clock ARed lacquer clock B

Red Lacquer Clock Case Restoration

Click image to open in enlargement window. Click image again to magnify. Use back button to return.

Shown above are two views, front and rear, of an English red lacquer clock case, after restoration. (In these photos, the case does not yet have the ormolu handle, finials, and other ornaments installed).

Upon initial examination, there were some typical losses of the lacquer decoration overall, but clearly the most severe damage had occurred on the top areas, as shown in the detail photo below.

Red lacquer clock detail before

My goal was to consolidate the remaining decoration, and then try to recreate the lost portions of the images around these fragments. In these situations, I find it helpful to look at as many other contemporary sources as I can find, e.g. lacquer clocks and other furniture, as a guide to imagine what the original images might have looked like. For example, the photo shown below is of a table top attributed to Giles Grendey (1693–1780) that was probably produced not long before our clock case. Though the art work on our clock case is more naïve, these types of references can still be quite useful.

Grendey table top

With the aid of many similar examples, and by carefully studying the existing fragments of decoration, I attempted to piece together the images as shown below.

1 Front before

Front before

5 Front after

Front after

______________________________

2 Rear before

Rear before

6 Rear after

Rear after

______________________________

3 Left before

Left before

7 Left after

Left after

_____________________________

4 Right before

Right before

8 Right after

Right after

__________________________________________________________________________________________

Coromandel Screen


coromandel-screen_wpl-e1448221463109[1] copy

Chinese Coromandel Screen Restoration

Click image to open in enlargement window. Click image again to magnify. Use back button to return.

The photo above is of a fine, old, large Coromandel screen (12 panels, each 1.5 ‘ by 9’). It was taken after I had completed my restoration work.

When I first examined the screen, I was dismayed to see the evidence of so many previous attempts at trying to keep the screen together, and aware of the difficulties I would face in my own efforts.

Apparently, most of the problems were the result of movement of the wood, and deterioration of the ground coating that lies between the wood and the visible lacquer surface. Another obstacle in trying to improve it’s appearance was that various pigmented and clear coatings had been applied in many areas, evidently to disguise losses and discoloration of the original lacquer. These varnish materials being Western in origin (as opposed to Eastern lacquer), their use had only contributed to the screen’s deterioration.

The photos below illustrate some of the problems encountered.

Loss 1

Loss

Loss 2

Loss

loss 3

Loss

Blistering

Blistering

Delamination

Delamination

Splitting

Splitting

______________________________

Ultimately, it was all I could do to just consolidate all of the loose areas, and fill/inpaint the losses with appropriate conservation materials.

Reattaching lacquer

Consolidation of fragile pieces

Securing loose lacquer

Adhesion with light pressure from clamps and sandbags.

______________________________

By the time I had finished, the screen was definitely more stable, and it’s appearance had improved considerably.

________________________________________________________________________________________

Papier Mâché Table

CC table 1

Papier Mâché Table Restoration

Click image to open in enlargement window. Click image again to magnify. Use back button to return.

Shown above is an English papier mâché table, after restoration.

Upon examination in my studio, most of the surface appeared to be in good condition; a light cleaning and a small amount of inpainting was all the surface required.

There were a few structural issues to address. On the base, one of the legs was somewhat loose, preventing the table from being used. Looking closely, it was apparent that a previous attempt to re-glue the leg had not been successful. In order to remedy this, the leg would have to come off to re-attach it properly. The photos below show the leg as it arrived, and after removal from the column.

CC table 3

Previous repair

CC table 4

Leg detached

_____________________________

After thoroughly cleaning the area, the leg was re-attached.

CC table 5

The other area to consider was the perimeter of the top. Table edges are always vulnerable to impact; with papier mâché objects any accidental collision can crush the relatively soft material, causing delamination of the layers of paper. These areas need to be carefully glued and clamped under light pressure to avoid deforming the shape.

CC table 6

______________________________

One final consideration: the papier mâché top is attached to a solid piece of wood underneath, which is then hinged onto a small block of wood attached to the top of the column. This allows the top to tilt from a horizontal position (when in use) to a vertical position (when on display). The wood under the top had warped somewhat over time, slightly bending the papier mâché top with it. A decision was made to leave this as is, rather than risk further damage by trying to correct it.

The photo below shows the restored table standing up straight, with the top showing a very slight slant.

CC table 2

__________________________________________________________________________________________

Penwork Table

Regency penwork table

Regency Penwork Table Restoration

Click image to open in enlargement window. Click image again to magnify. Use back button to return.

The photo above shows an English Regency penwork table, as it arrived in my studio. Evidently, the base, and a corner of the top, had been repeatedly gnawed by a pet dog.

In addition to that, the table had been exposed to wide ranges in environmental temperature and relative humidity, causing excessive expansion and contraction of the wood. Since the penwork decoration is painted on a veneer applied to solid wood, the inherent tensions in this construction resulted in some warping of the solid wood, and some splitting and lifting of the veneer.

The first step was to try to secure the loose areas on the top and base.

repair 1

__________

repair 2

The detail photos below give some idea of the damage to the base, and the subsequent restoration.

foot before 1

First area

foot after 1

__________

foot before 2 cr rs

Second area

foot after 2

__________

foot before 3

Third area

foot after 3

__________

base after 2

Base after restoration

______________________________

The following photos show a similar treatment for the top corner.

top corner before

Corner damage before and after.

top corner after

______________________________

On the top, the various splits and openings were filled and inpainted to match the surrounding area.

top split before

Above, one of many openings to be addressed

top after cr

The top, after repairing, cleaning and finishing.

__________________________________________________________________________________________

Scagliola Table Top

scagliola-table-top_0325-wpl11-rs-adj wpl

Restoration of a Scagliola Table Top

Click image to open in enlargement window. Click image again to magnify. Use back button to return.

Shown above is a photo of an old scagliola table top, taken after restoration.  The detail photo below shows the condition of the table top when I received it.

Client photo

The top had been in storage for many years, after suffering much damage from previous use. Evidently a very degraded varnish had allowed water to penetrate to the scagliola surface, softening the material enough to cause considerable losses. After thorough examination I decided to investigate the possibility, and the benefits, of removing all of the old varnish.

__________

Varnish removal test

The photo above illustrates some tools and materials used for testing the varnish removal, and a “wet color” test to determine the visual effects of the exposed scagliola surface. I decided to proceed with the varnish removal.

__________

 Varnish removal begun

Beginning the removal at the corner.

__________

Varnish removal near completion

Half way through.

__________

Varnish removal complete cr sk

Varnish removal complete.

__________

Wet color cr sk

At this stage, I apply a fluid (in this case mineral spirits) to the top, to view it’s “wet color”. While wet, I can see that the surface is clean and smooth, and that all of the images are clear and colorful. I can now begin to address the damage to the scagliola.

__________

marbleized paper before

The photo above of the “marbleized paper”, and the photo below of the “sheet music” show the areas that required the most attention.

Music sheet before

__________

Marbleized paper music sheet after

These photos show the area after treatment.

Music sheet after

__________

top left cr rs

After all of the damaged areas had been restored, the entire table was given a finish that saturated all the colors and provided protection for future use.

The left side of the top is shown above, the right side below.

top right cr adj

__________________________________________________________________________________________

Folk Art TV Cabinets Link

The TV cabinets shown below are part of a group of cabinets designed by Anthony Baratta LLC for the guest rooms in a private residence.

tv cabinet_8723wpl

____________________________________________________________

tv cabinet_8688wpl

____________________________________________________________

tv cabinet_8766wpl

____________________________________________________________

tv cabinet_8754wpl

____________________________________________________________

White and blue lacquer panel link

TR Armoire wpl 1

White and Blue Armoire

I was asked by an architect to submit ideas for the decoration of an armoire that was to be built for his client. After a discussion about colors, motifs, etc. I created the blue and white sample panel linked to this page. The armoire was then constructed, and I completed the finish work as shown.

____________________________________________________________