
Lacquer Panel Demonstration
Project Model
Click image to open in enlargement window. Click image again to magnify. Use back button to return.
The panel shown above was created as a model, in preparation for a project in which several panels of various sizes would be installed around the walls of a residential entrance hall (see some photos of the completed project under the entry “White Lacquer Panels” in the navigation bar).
While preparing it, I took some photos in progress, to demonstrate the basic procedure for this type of lacquer work.
The dimensions of the panel are 16″ x 20″. The support is 1/8″ hardboard, painted white. (These choices are optional, other sizes and materials could be substituted).
_____________________________________________________________
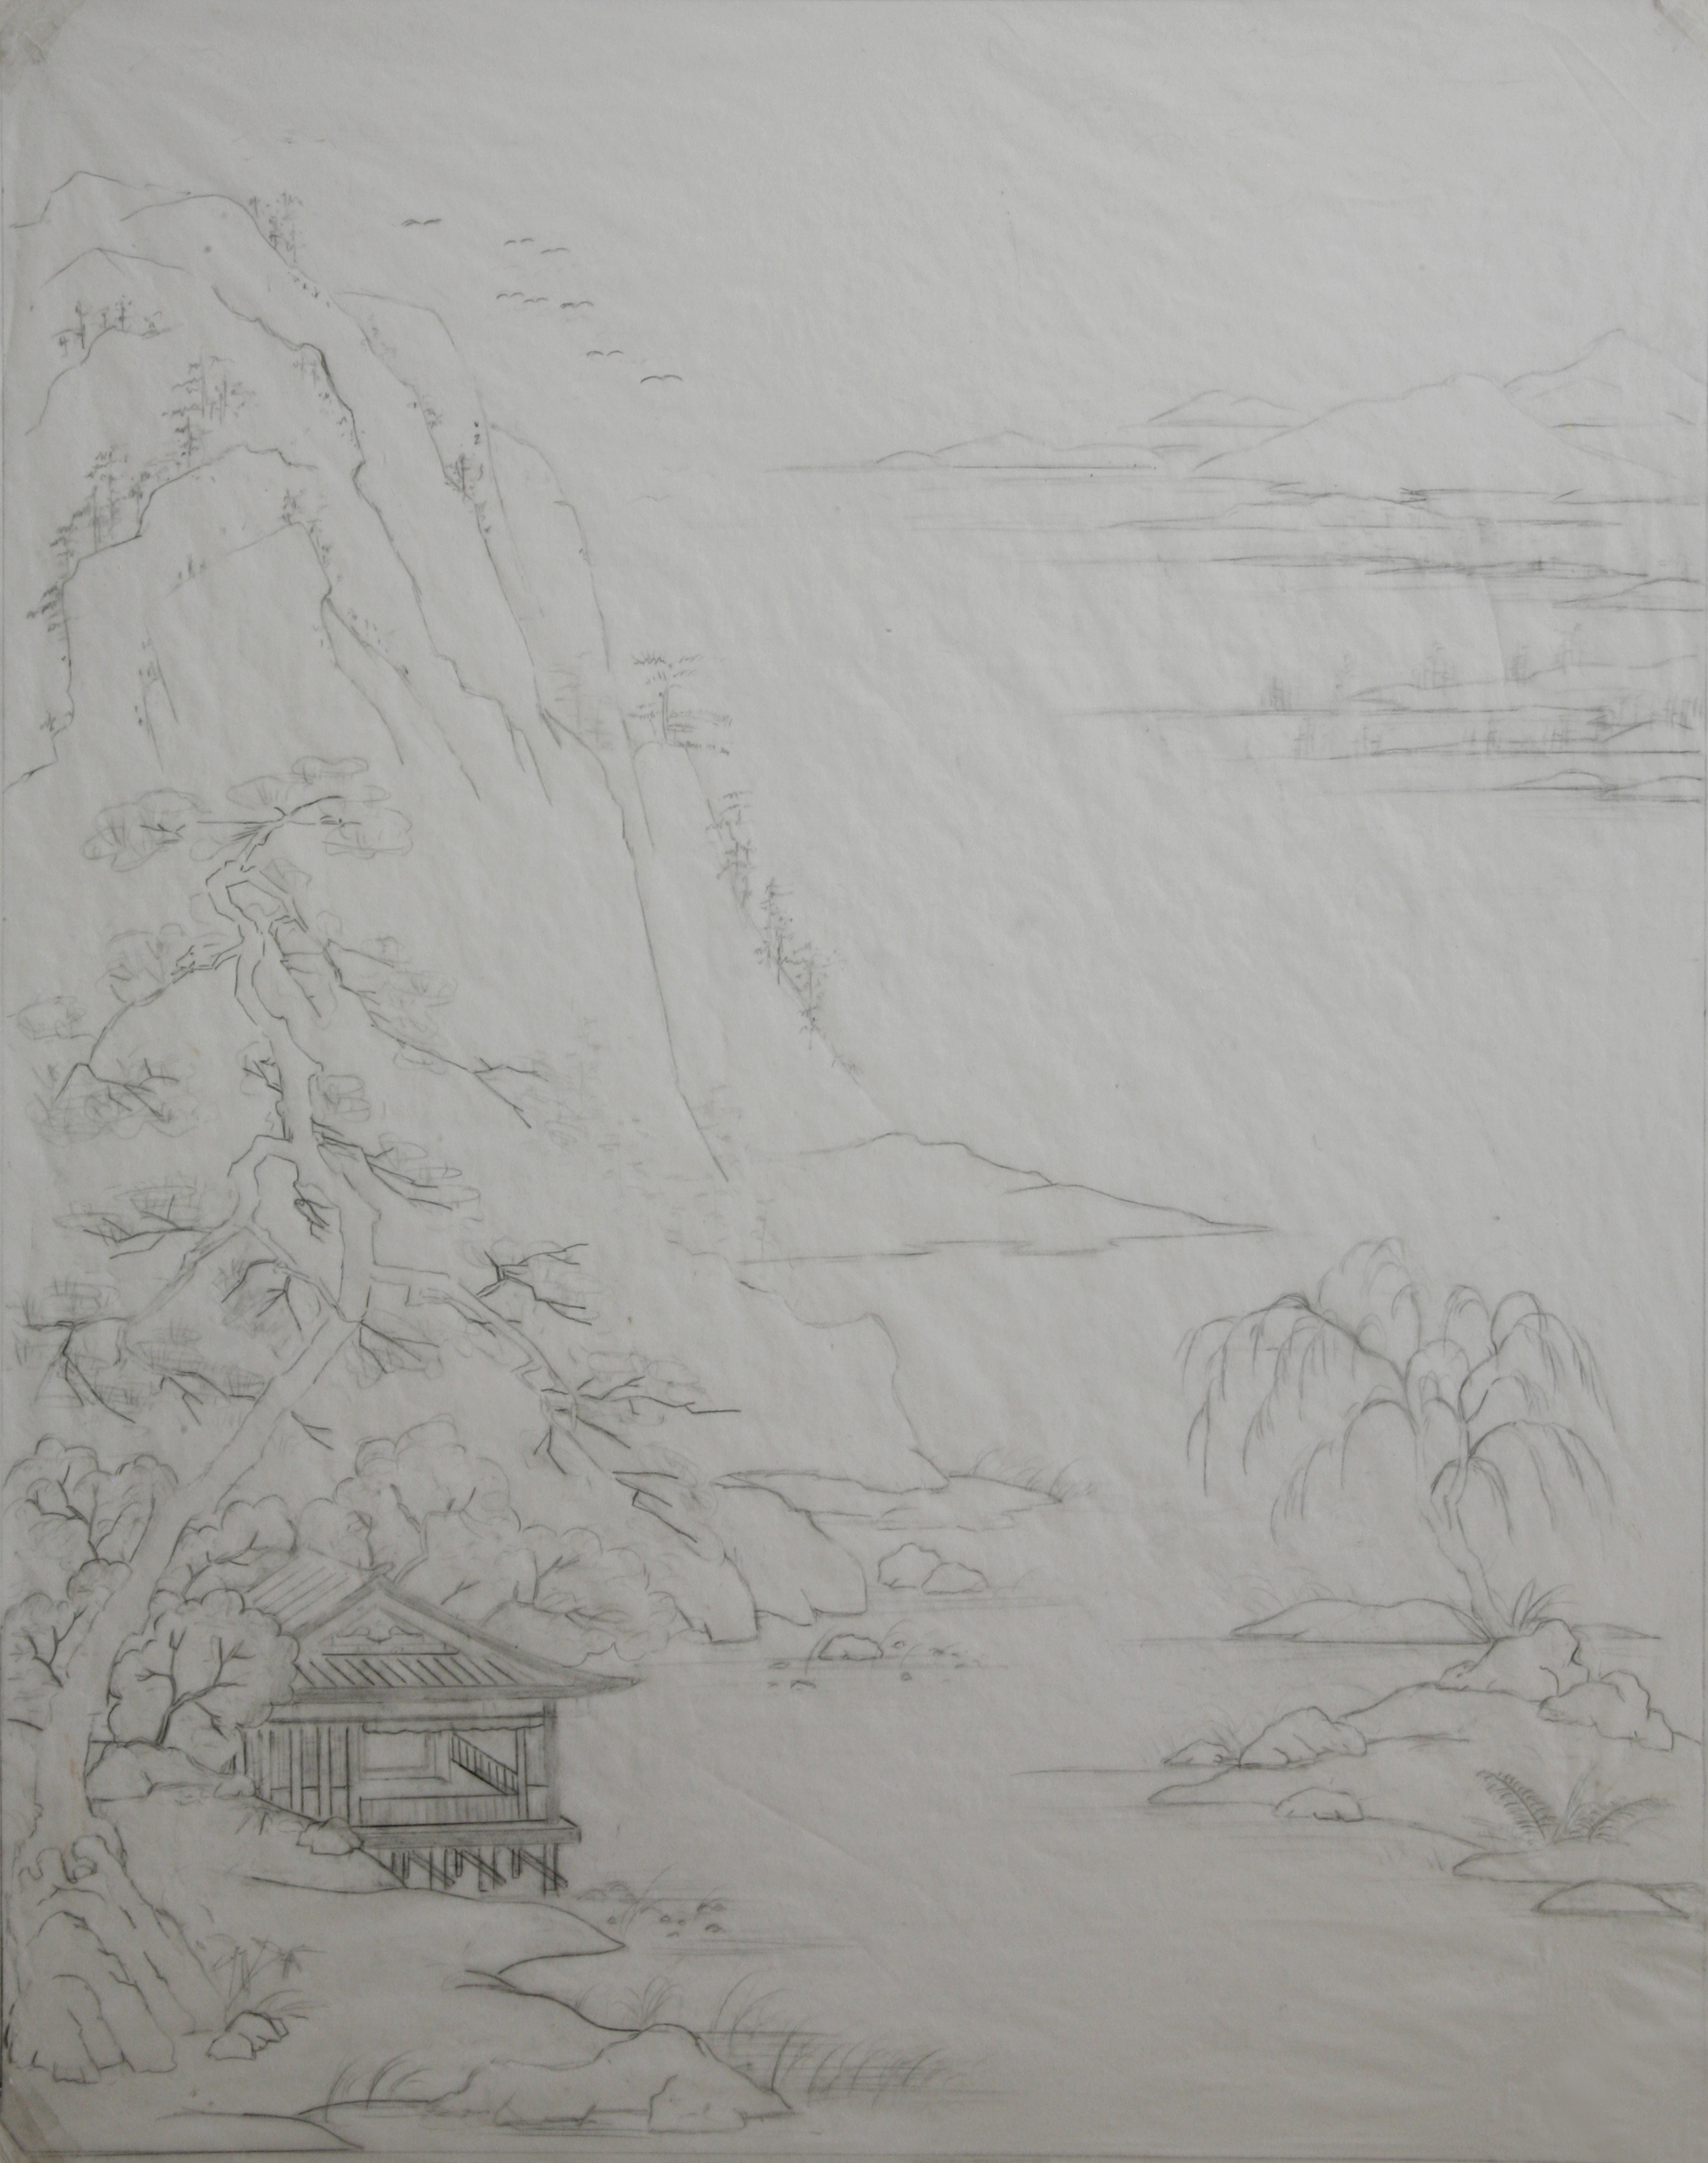
Drawing
The design was drawn on tracing paper, for easy transfer. To best convey the ultimate effect, I tried to fit as many of the traditional landscape elements as possible in this small space.
In each of the stages that follow, only the particular design elements required are transferred from the drawing.
____________________________________________________________
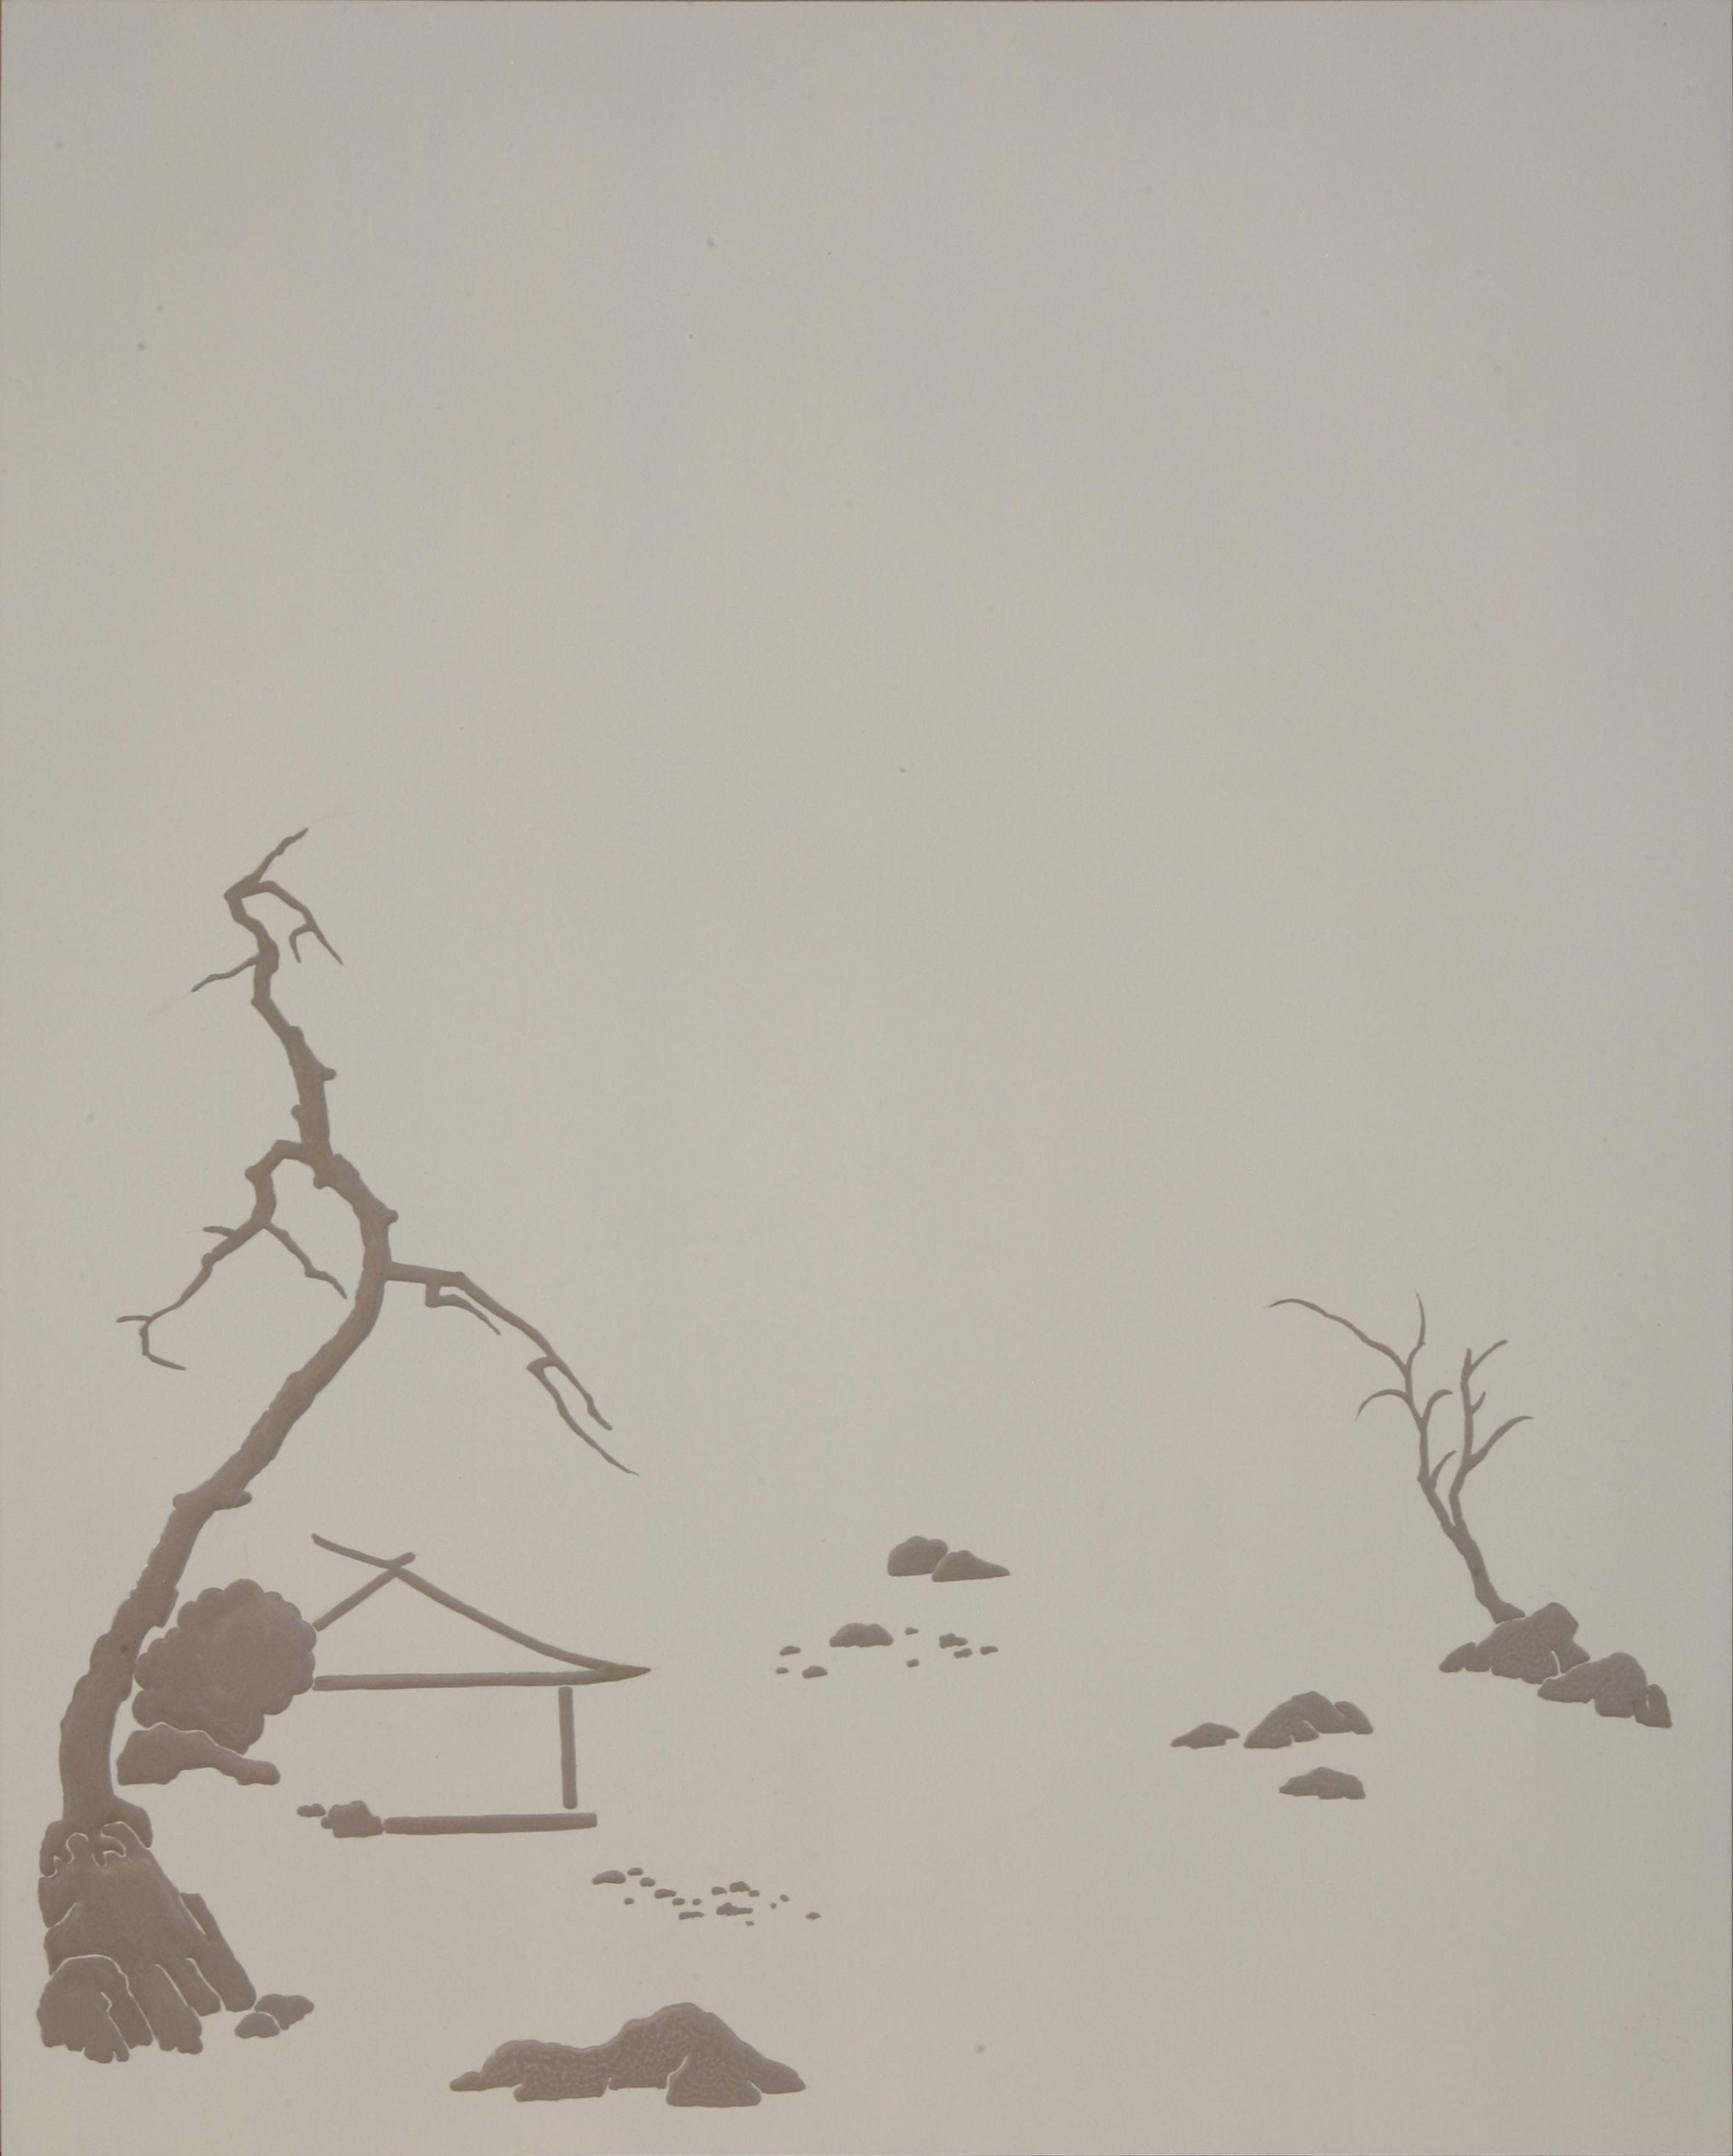
Raised Elements
After painting the panel, the first stage is applying the raised elements. Some of them may be applied in one step, others may require multiple layers. After completion, they are allowed to dry. The white surface is inspected thoroughly for pencil lines, smudges, etc. These elements are now sealed with the appropriate finishing material, either independently, or by sealing the entire surface.
____________________________________________________________
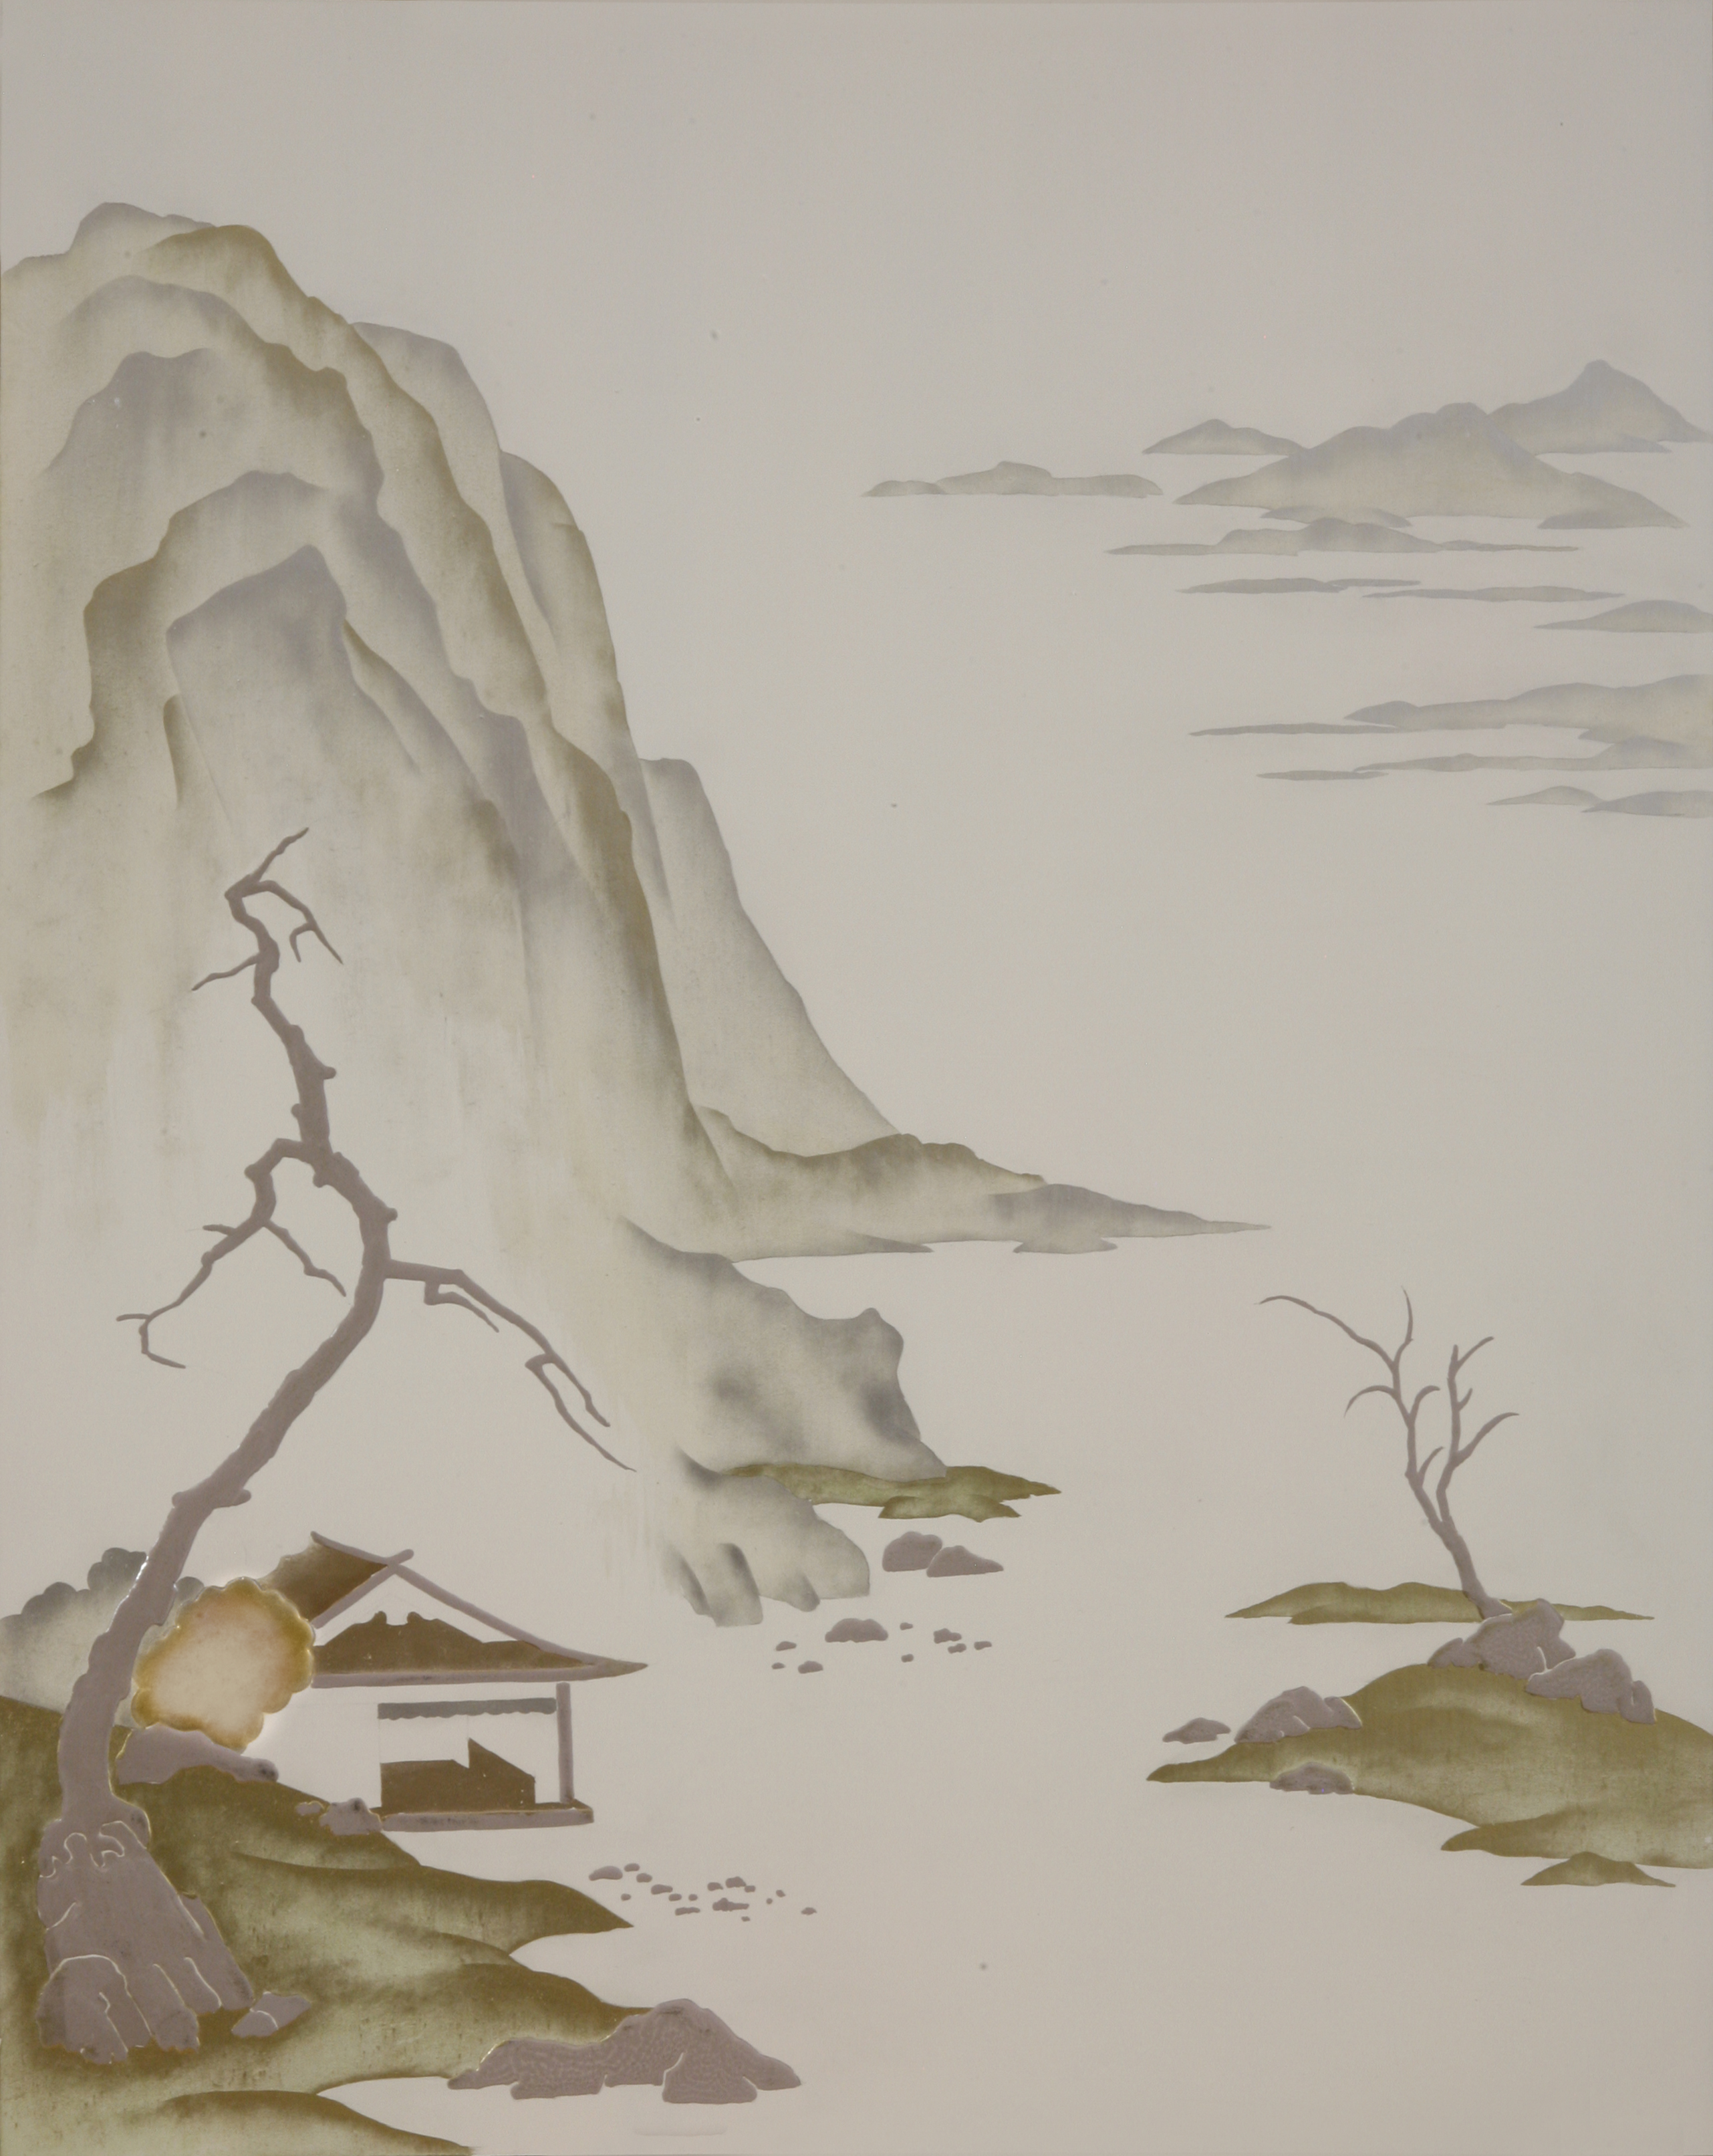
:Powdered Elements
The metallic powders, mostly gold and silver, are applied to render the landscape and architectural forms. After drying, and another inspection for blemishes, the panel is sealed again.
____________________________________________________________
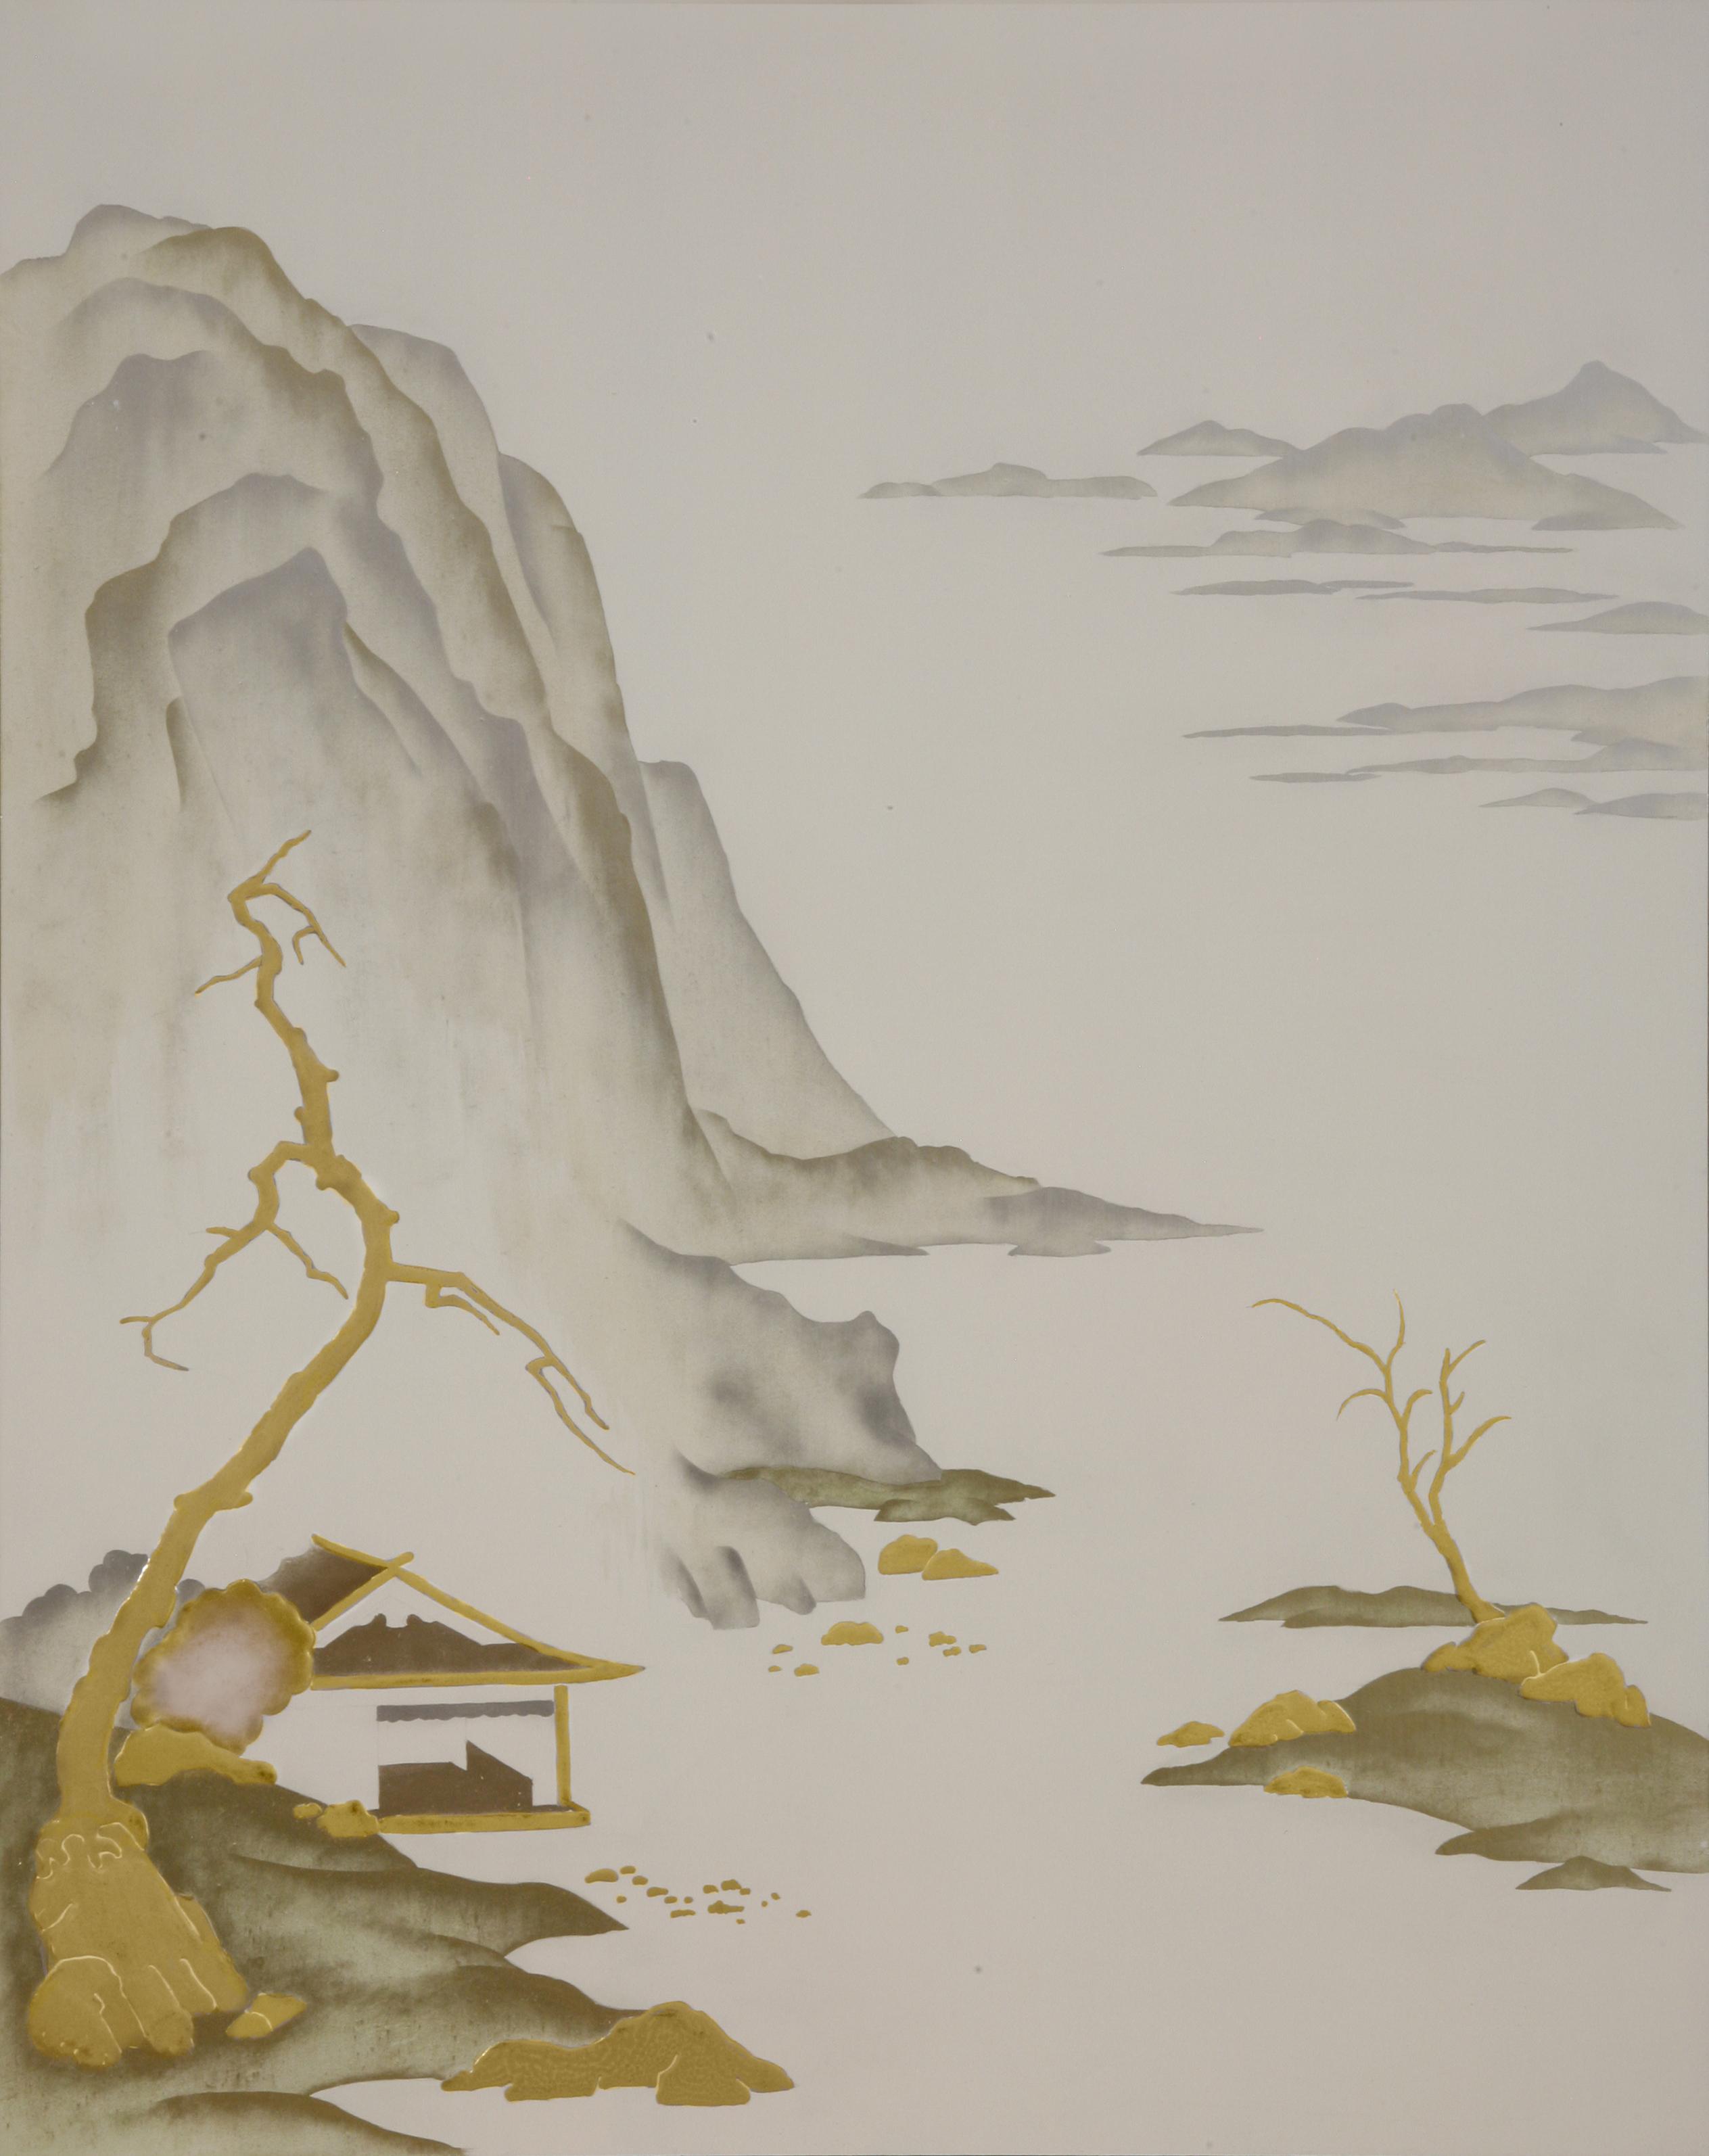
Gilding the Raised Elements
The decision to gild the raised elements now, or after the following stage, is optional. I usually prefer to do it at this time, as it helps me to visualize the details that follow. However, being raised above the surface makes them more vulnerable to damage as work progresses; care must be taken to avoid this. If gilded now, they are sealed before continuing.
____________________________________________________________
Gilded Details
Lastly, all of the gilded details are added. Some of them may be transferred from the drawing, particularly straight lines, or precisely placed elements like the birds, etc. The foliage is painted freehand.
If the lacquer style is such that all of the art work is rendered in metallic pigments alone, the panel would be ready for the final finishing at this time.
In this case, as typically, I added some details in ink. (This is common traditionally; sometimes small details are painted in red lacquer).
To complete this panel, after adding the gilded details, the panel was sealed. The ink work was then applied and sealed, followed by the final finishing.
____________________________________________________________
